Security NetWorkings
Proper Handling for Fiber Optic & Network Cables
NETWORK CABLING
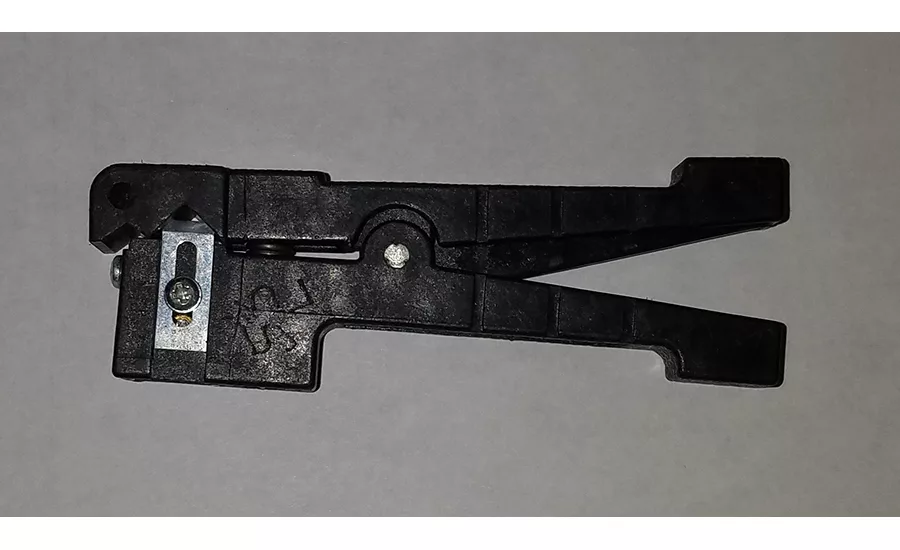
The proper tool to remove the outer jackets of Cat5e/6 or indoor fiber optic cable is the Ideal Cable Stripper.
IMAGE BY DAVE ENGEBRETSON
TECHNICIANS NEED TO BE AWARE that the high performance network cables can provide is dependent on how they are pulled, handled and terminated.
Let’s look at a typical Cat5e/6 cable. There are the four twisted pairs, each twisted at a different rate to reduce crosstalk between the pairs. Care should be given during the cable pulling process not to exceed 25 pounds of pull strength. Violating the pull strength rating can cause the twists in the pairs to untwist or spread out, affecting the cable’s performance for the transmission of high-bandwidth data.
Fiber optic cables, on the other hand, are much more robust in terms of maximum pulling strength. Typical indoor fiber cables have pull strength ratings of 100 pounds, while outdoor cables can have pull strength values as high as 300 pounds. Each fiber cable has an inner wrap of Kevlar, which is bulletproof vest and helmet material. This Kevlar wrap contributes to the pull strength rating, and it is critical that when pulling fiber optic cable, you tie to the Kevlar, and do not pull the fiber cable by the outer jacket. As the Kevlar is very strong and has little stretching capability, using it to pull the fiber will reduce the potential of damage to the very thin glass strands within the cable.
Whether it’s a Cat5e/6 or fiber cable, the removal of the cable’s outer jacket must be performed correctly, using the right tools. UTP conductors are solid copper, usually 24 to 26 gauge (i.e. quite thin). Indoor fiber optic strands have the outer jacket, Kevlar wrap and typically a 900-micron plastic jacket covering each glass strand. In either case, technicians need to be careful using metallic edged tools to remove jacket sections, because if either is nicked by the jacket tool, the fiber and/or the copper conductor may break. The break may not happen during the installation, but could occur later due to temperature fluctuations or if the cable is moved.
The proper tool to remove the outer jackets of Cat5e/6 or indoor fiber optic cable is the Ideal Cable Stripper, ADI part number IL-45165. This tool is spring-loaded and has two razor edged blades that are adjustable for cutting depth with a small Phillips screwdriver.
The keys to successfully using this tool are simple. First, adjust one of the blades so that it protrudes about 1/8” into the cable pocket. Make sure the other blade (which is a spare) is set to be flush with the surface that meets the cable jacket — you don’t want to cut the jacket twice.
With the adjustment done, whether it’s copper UTP or fiber, it’s best to take off about 3-4 inches of jacket at a time. Take the tool, put the cable into the pocket on the tool, and let the tool’s spring press the blade onto the jacket — don’t push down on it yourself. Spin the tool around the jacket 360 degrees three or four times, take the tool off and see what has resulted. With proper adjustment, you should be able to remove the section of cable jacket with your hands only, though you may have to wiggle it a bit to finish the cut of the outer jacket. If the tool hasn’t cut deeply enough, readjust the blade and try again.
Looking for quick answers on security topics? Try Ask SDM, our new smart AI search tool. Ask SDM →
The key is that the metal razor blade does not directly contact the inner conductors, whether they’re copper or fiber.
Use the right tools for cable preparations and you will save yourself and your company on call backs and problems with connectivity that can result from sloppy cable prep.
Looking for a reprint of this article?
From high-res PDFs to custom plaques, order your copy today!


 copy")

